Across the Road Inspired Ecoprints

It is rather last minute to still be working on things for Christmas sales, but I will be driving by the Artery today and have time to drop off a few more items.

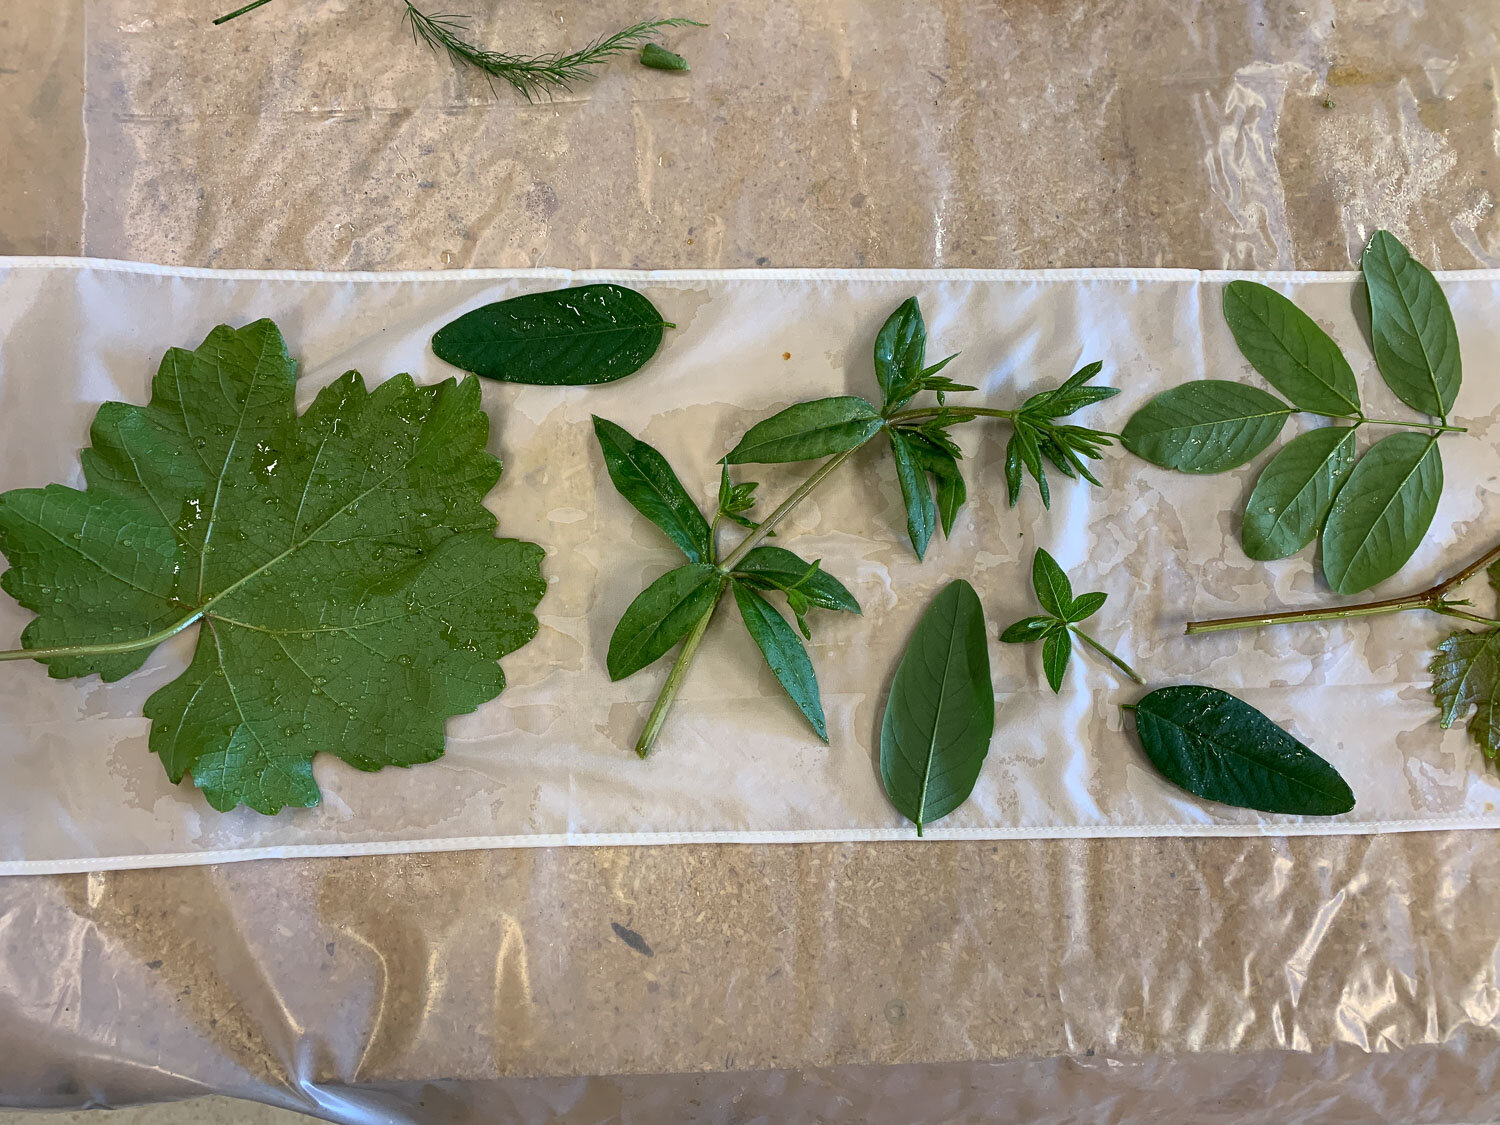
A walk Across the Road inspired these last ecoprint scarves. I refer to them as Solano Garden Botanical Prints. Every time I do one of these I consider it an experiment. There are so many variables. Which part of the plant? Fresh or dry? Growing or dormant season? Front or back side of the leaf facing the iron or tannin soaked scarf?

Variety of plant material collected for ecoprinting includes leaves, fruit, stems, nuts.

This is the collection I brought home. Top left is an osage orange fruit (not edible) and some twigs. Next are black walnut leaves ready to fall off the tree. Third from left, top row, are a couple of sunflower seedlings that grew after the rain that germinated the leftover sunflower seeds at the edge of the field. Eucalyptus twigs and leaves are on the right. Just left of the eucalyptus is mistletoe. Bottom center is a pisolithus, a fungus known as dog turd fungus, that was emerging from the hard-packed dirt road. I’ll save that for a later dye-bath. There are also some oak galls and a couple of oranges.

Experiments 1 and 2. The scarves on the plastic were dipped in tannin. The lower one is spread with sunflower leaves and black walnut leaves. The upper one has eucalyptus leaves and a few sprigs of mistletoe leaves and berries. After spreading out the plant material I cover the first scarf with another that has been dipped in iron, roll these up and steam them.

Leaves and other plant material spread on scarf for ecoprinting.

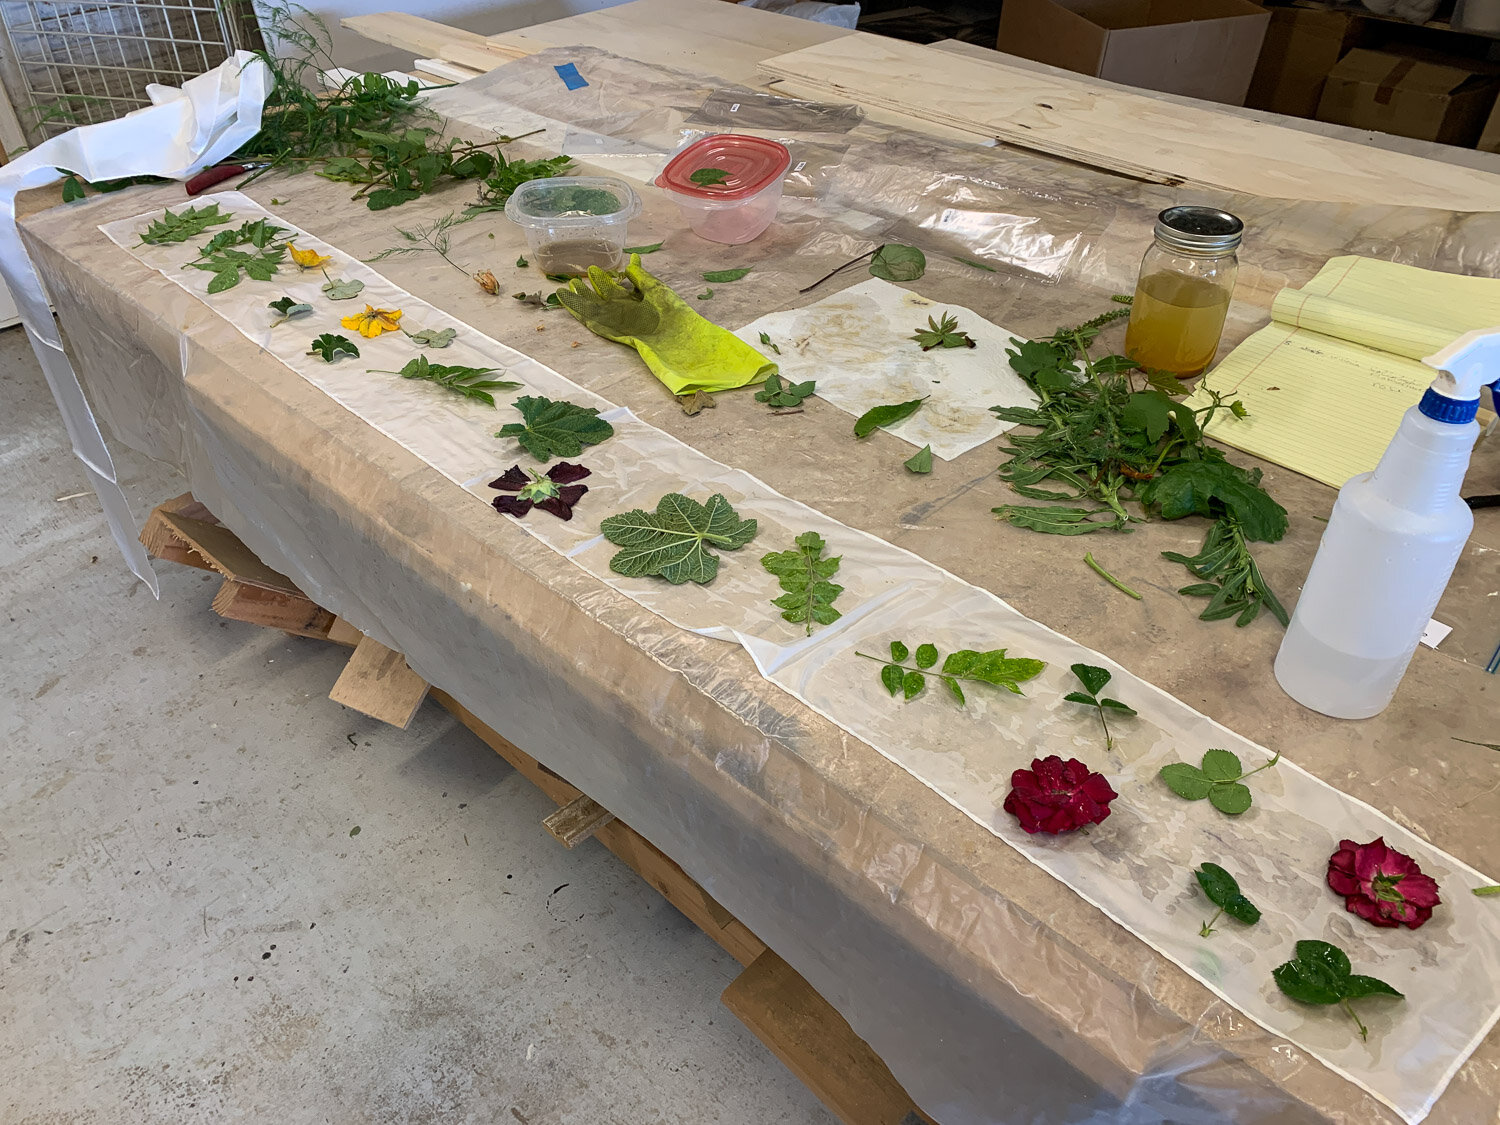
Experiments 3 and 4. I started to cover these with the second scarves before I remembered to take a photo. So the one at the lower edge of the table is mostly covered. It has redwood, sheoak, and eucalyptus from our property. The upper scarf is the biggest experiment. I wanted to see what would happen if I slice the osage orange fruit. Osage orange is a popular dye plant, but it is the shavings from the wood that have dye properties. I have never heard of using the fruit. When you slice it is kind of squishy with a milky sap. Hmmm. I went ahead anyway. I tried to cut small slivers of the wood as well and sprinkled those on. Then I added eucalytptus leaves.

Detail of ecoprinted scarves with leaf images.

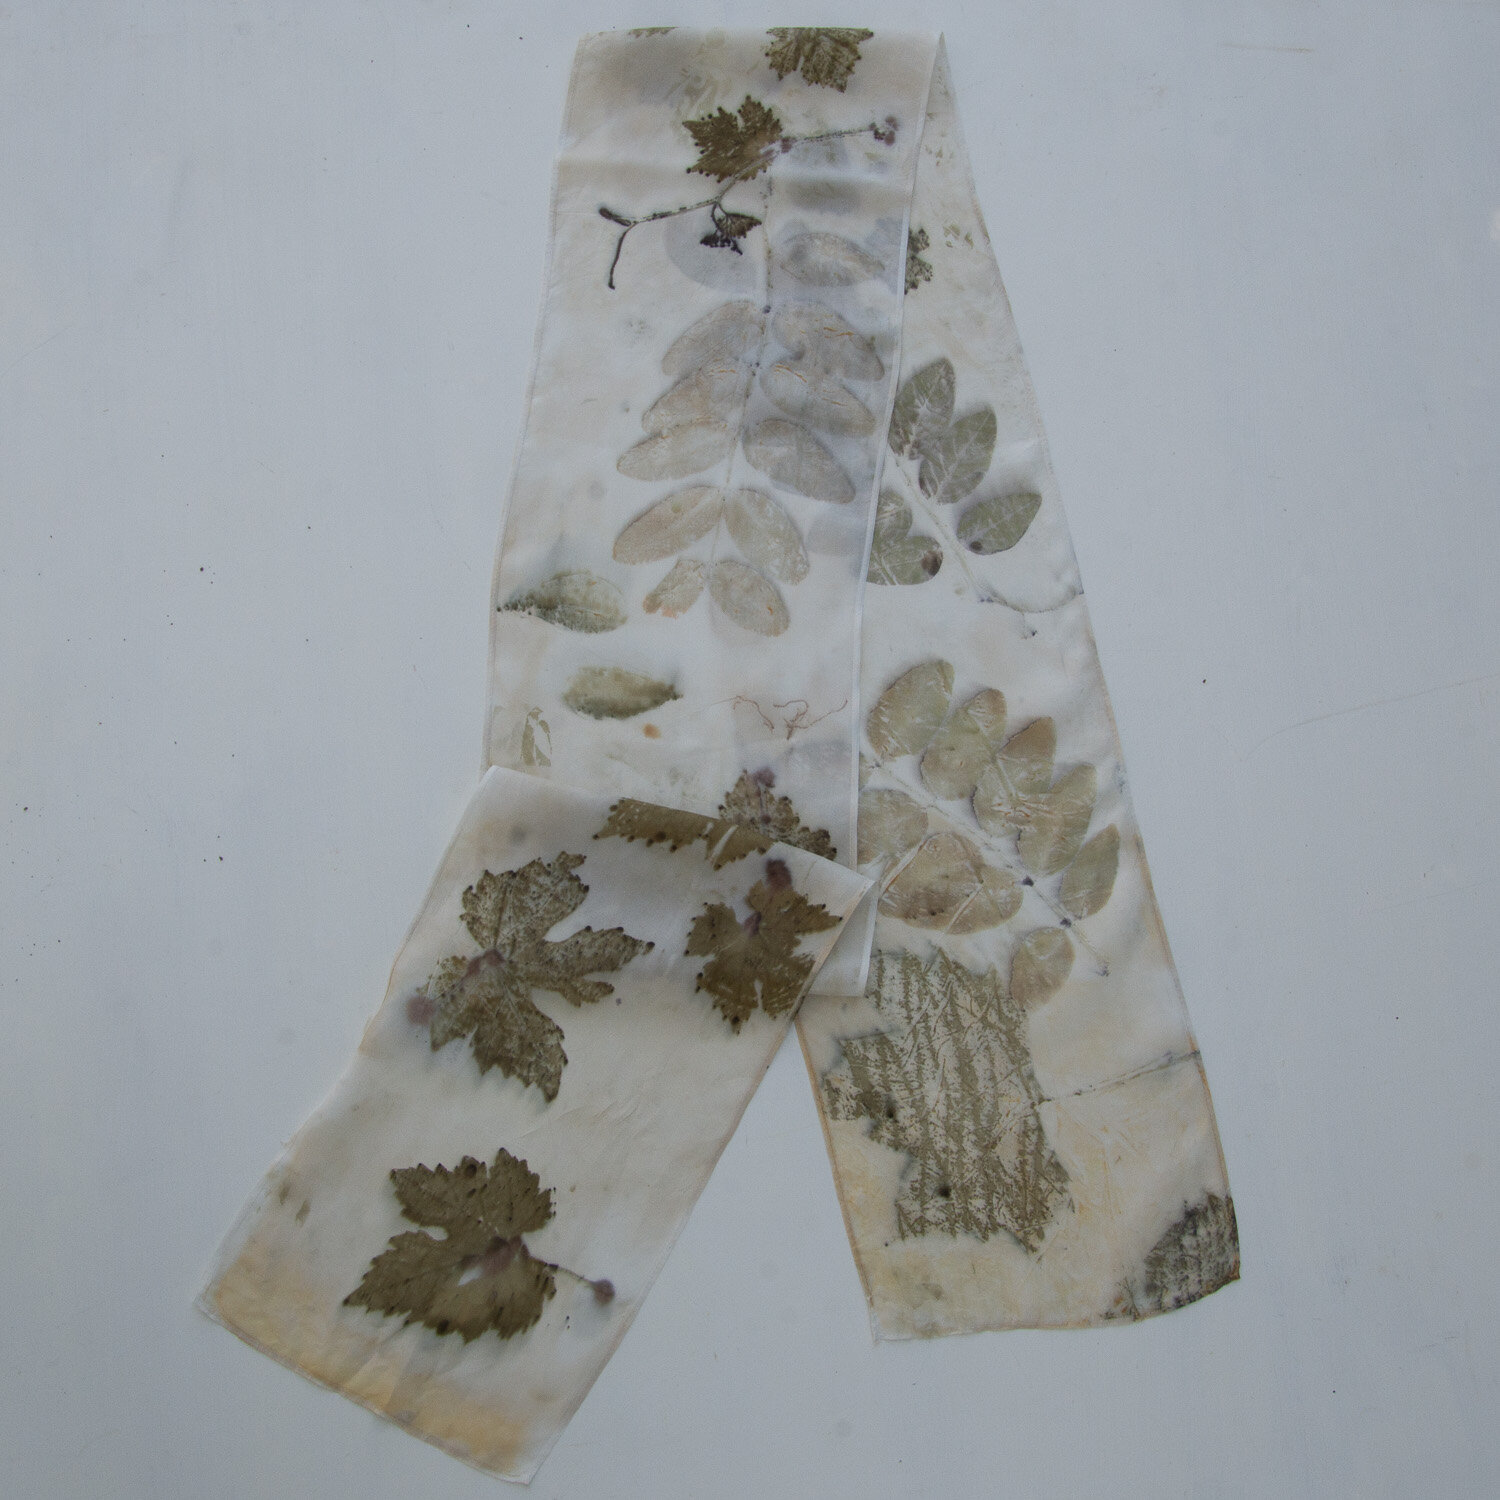
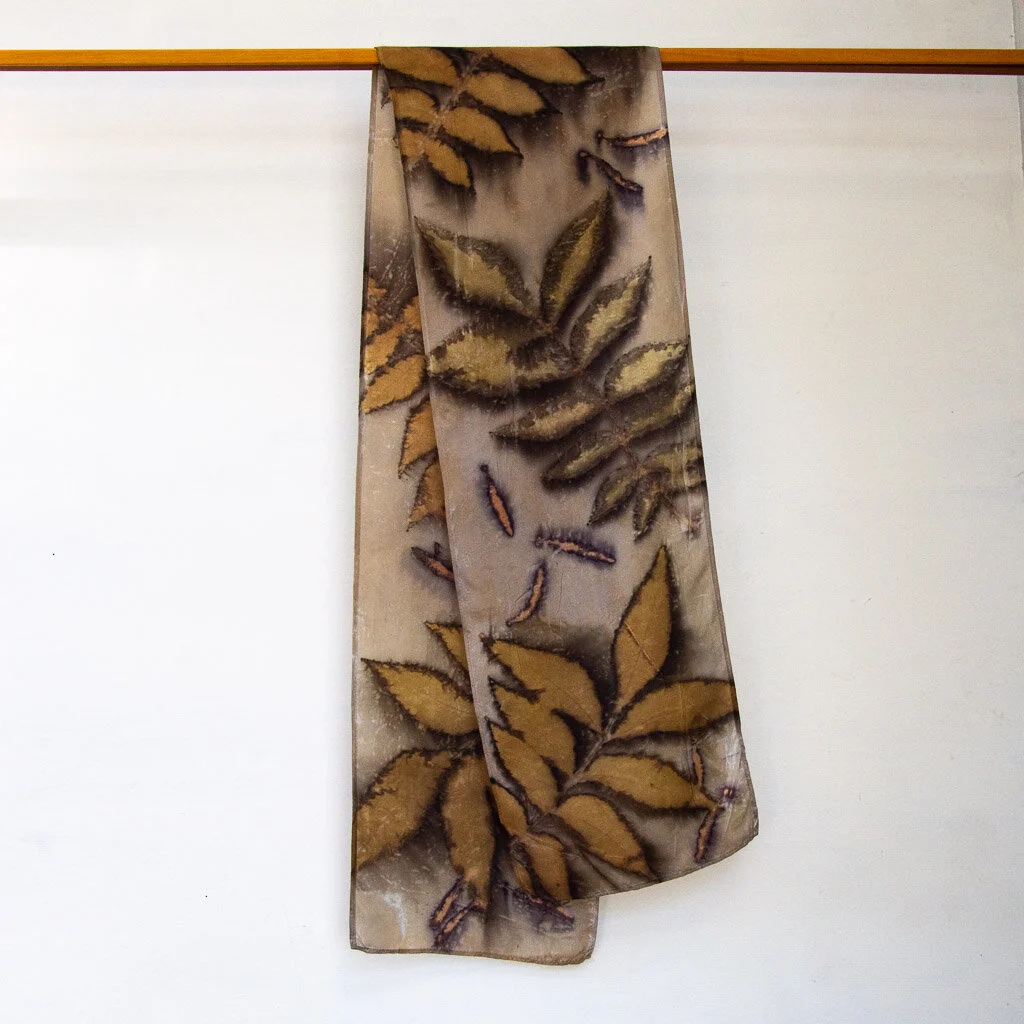
These are the two scarves that imprinted with sunflower leaves and black walnut leaves. In each pair of scarves I find it interesting to see how the leaves react on the tannin or iron soaked surfaces.

Detail of ecoprint scarves with imprints of sunflower and black walnut leaves.

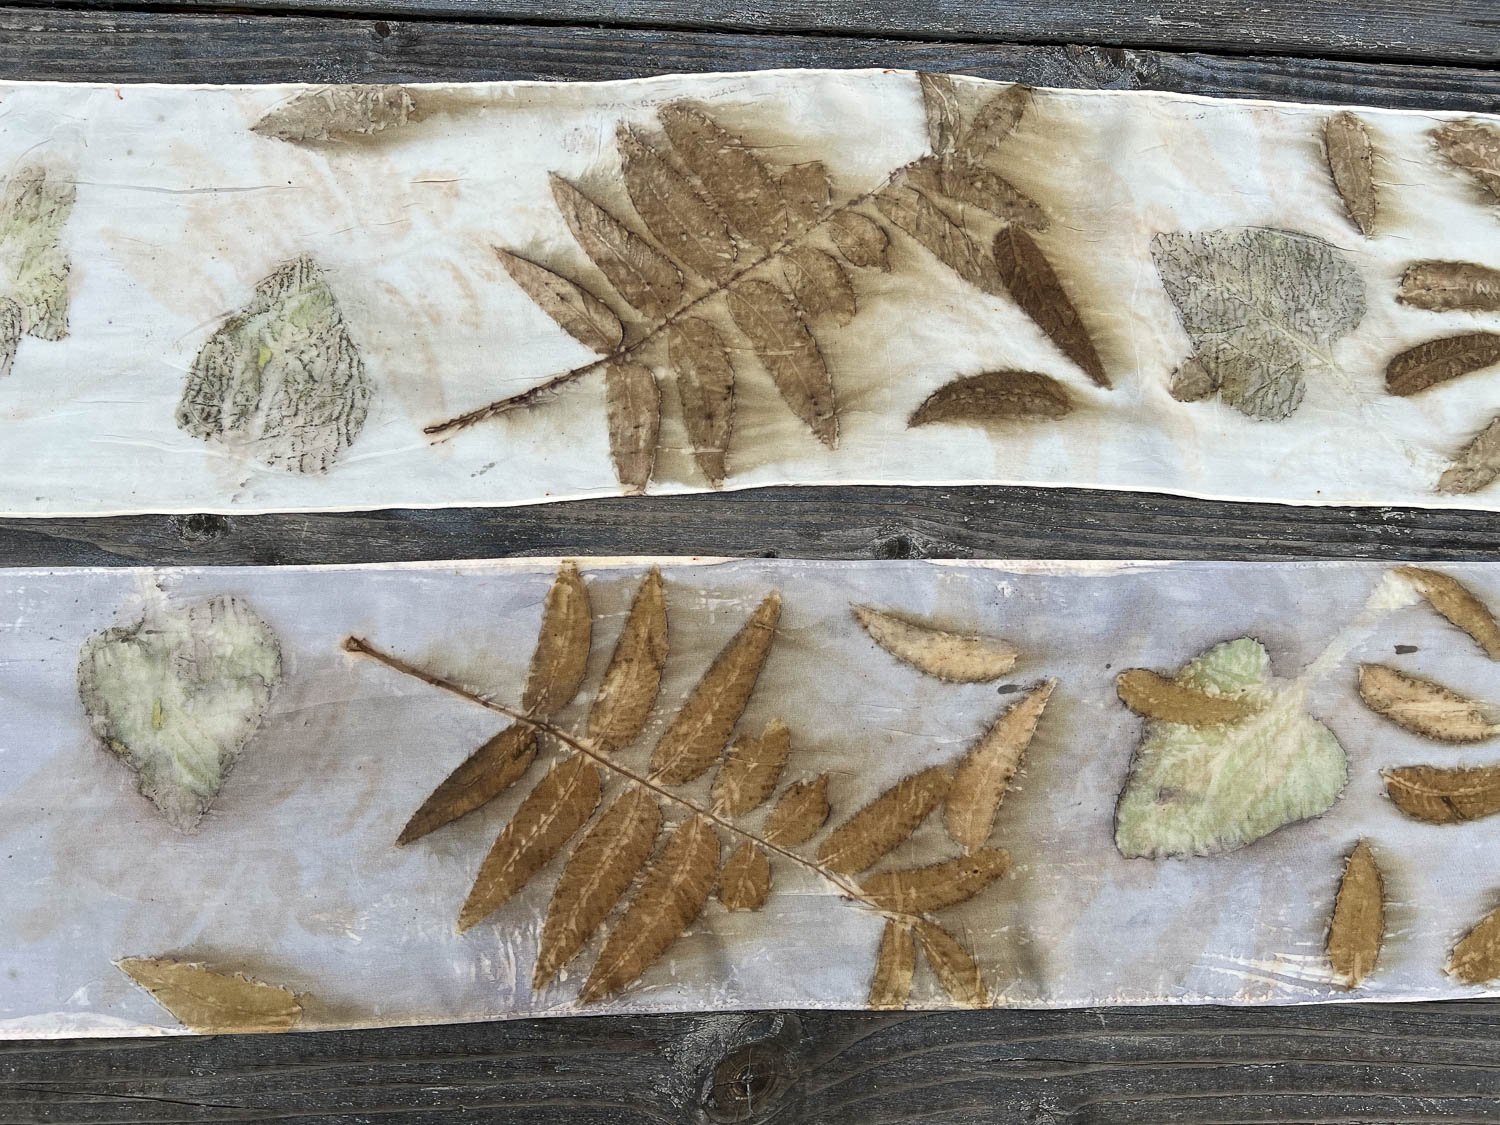
These are the same scarves, but a close up of a different part.

Ecoprinted scarves with images of black walnut and sunflower leaves.

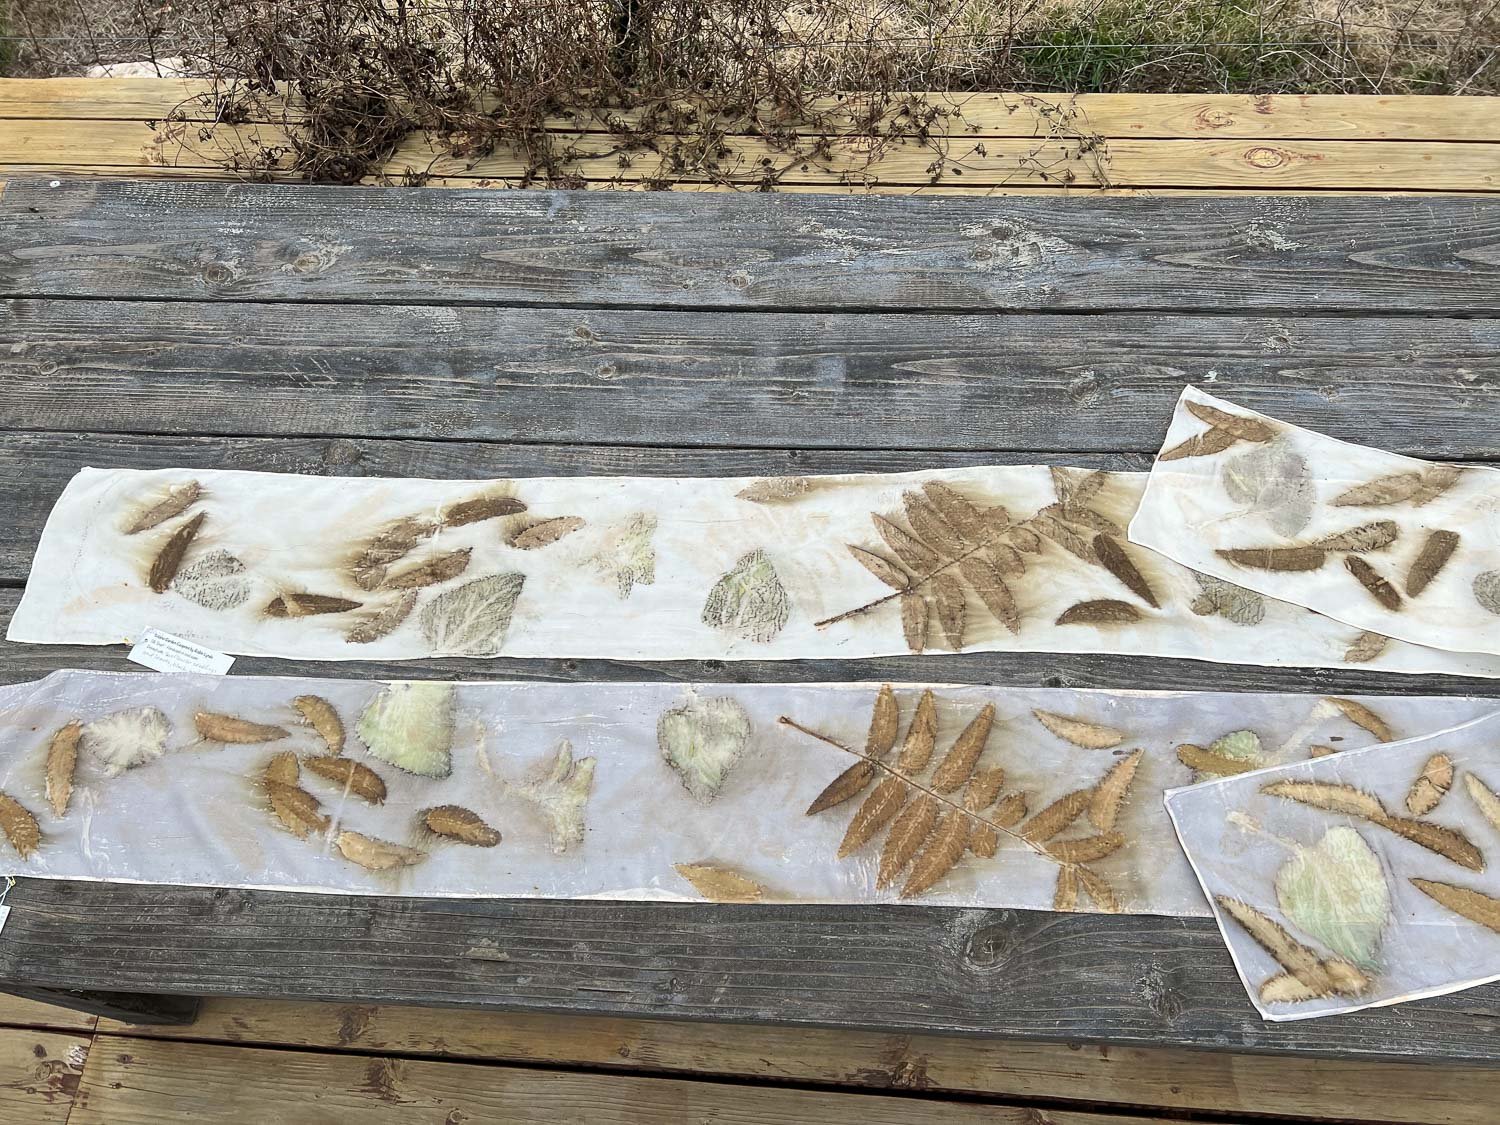
This is how those two scarves look.

Ecoprint silk scarves with images of eucalyptus leaves.

These are the scarves with eucalyptus and mistletoe. The tannin soaked scarf shows something of the mistletoe—that’s the smudgy part, but there is very little on the iron soaked scarf. It’s interesting how the eucalyptus looks so different on the two.

Close up of ecoprint scarf with images from osage orange fruit and eucalyptus leaves.

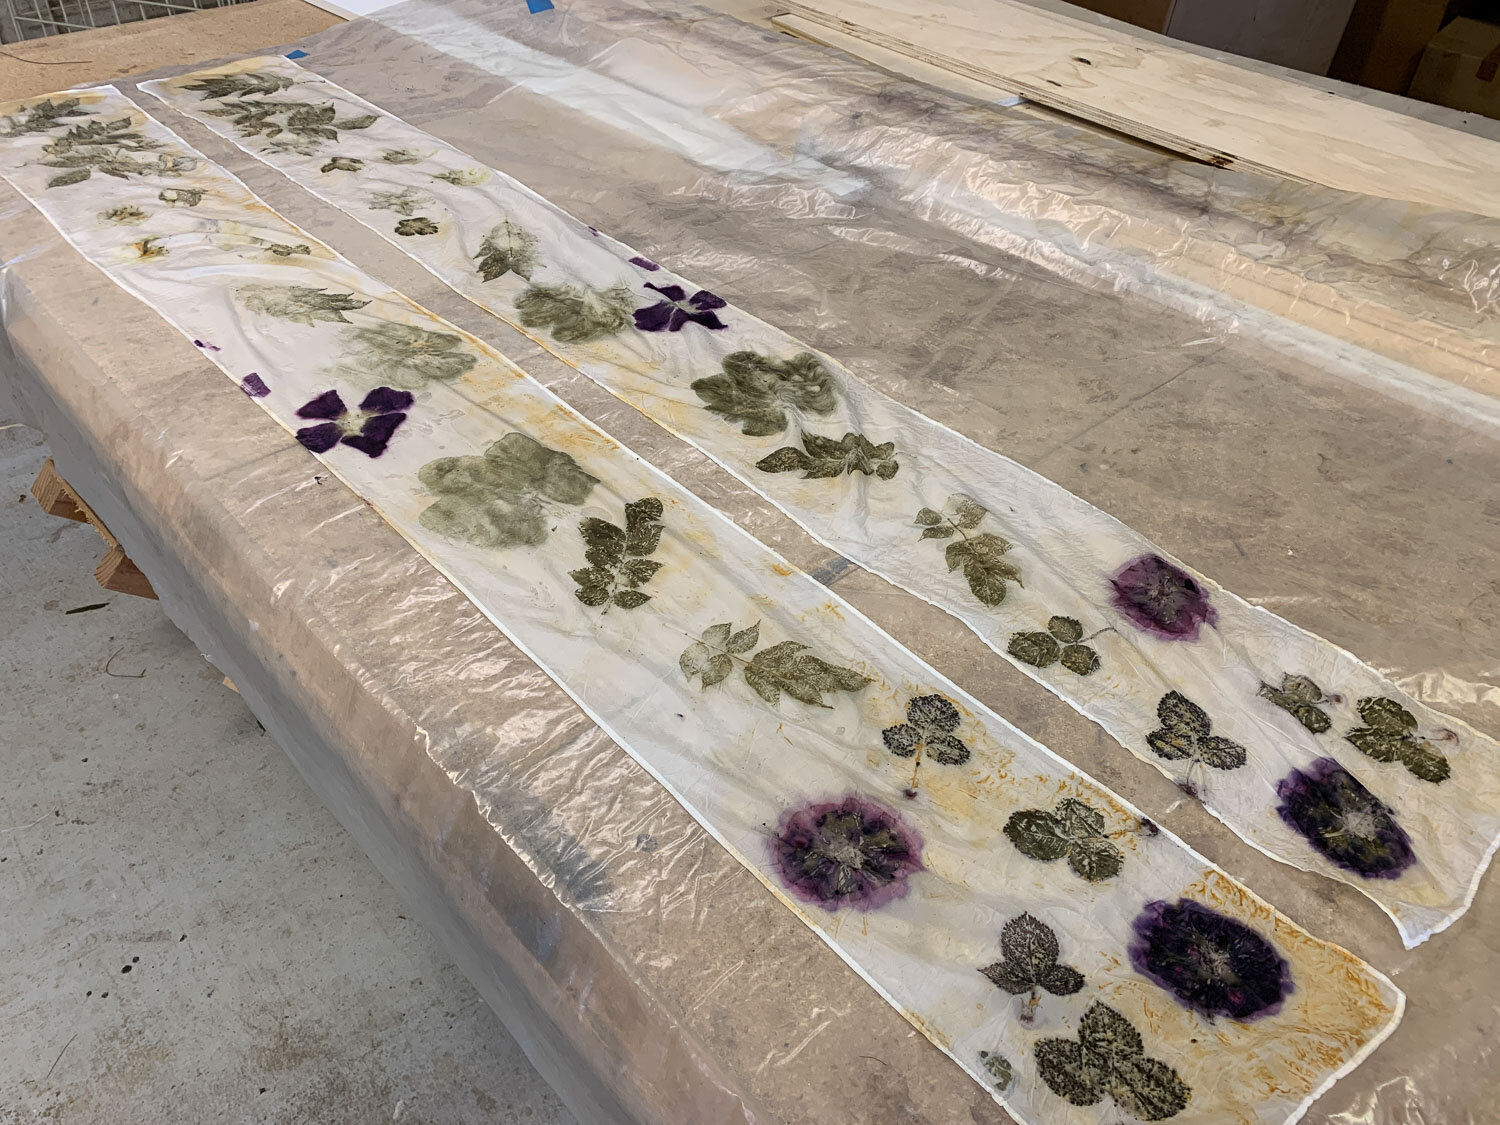
Here’s the crazy one. Those circles are the osage orange fruit. The cut up twigs didn’t do much—there are some spots that you see on the upper scarf.

Ecoprint scarves with imprints of redwood and sheoak and oak eucalyptus leaves.

This is eucalyptus leaves (different from the ones Across the Road), redwood, and sheoak.

I’ll be delivering some of these to the Artery soon.

More Ecoprints

I continued last week’s ecoprinting experiments. I consider all ecoprints to be experiments because I’m never sure of the result.

BP-2119-1.jpg

This one has grape leaves, bottlebrush and rose flowers, and Casaurina (the “leaves” that look like pine needles).

BP-2119-4.jpg

I get carried away with photographing all the stages of this process but I find it so interesting to follow the results. These are two scarves that sandwiched the leaves and flowers. With some leaves it makes a difference which side of the leaf is “up”. that is not so obvious in these scarves but it made a big difference in some below.

BP-2119-7.jpg
BP-2120-1.jpg

This scarf has (from left to right) “foxtails”, redwood, grape, pomegranate, madder leaves (and a root), more pomegranate, hollyhock flower, redwood, and lavender flower and leaves.

BP-2120-9.jpg

This view is a good example of leaves turned face up or down. It didn’t seem to make much difference with the madder leaves in the middle but the difference in the pomegranate leaves on either side is evident. The leaves were again sandwiched between two scarves. The dark leaf prints are from where the leaves were vein side against the fabric and the light prints are if the top side of the leaf was against the fabric.

BP-2120-8.jpg
BP-2121-1.jpg

I decided to add a little extra color to this one but took a short cut and just sprinkled a little dye powder on the fabric.

BP-2121-2.jpg
BP-2121-6.jpg
BP-2121-7.jpg
BP-2122-1.jpg

This was the last one for yesterday—with a sprinkle of turquoise dye powder.

BP-2122-7.jpg
BP-2122-9.jpg

I can’t walk around outside without wondering what images I could get from all the plants I see. The possibilities are endless.

Ecoprinting Experiments

I learned to create ecoprints a few years ago and have successfully sold ecoprinted silk scarves at the Artery, the artists’ coop to which I belong in Davis CA. When I saw that there were virtual classes in ecoprinting offered through Maryland Sheep and Wool Festival I thought I’d find out how others are doing this.

BP-2101-2102-1.jpg

I watched on my iPad and had plenty of room to spread out on the work table in the garage. This instructor sent wool and silk samples for the ecoprinting classes so that’s what I started with. I had more silk scarves here because I had intended to do more printing last year. So these classes were the incentive to get me started again. This post is really just a way for me to organize my photos and to analyze and document the results..

BP-2103-1.jpg

There are so many variables in botanical printing it can seem overwhelming to try and track everything.:
Which plants? Time of year—new leaves or mature leaves? Flowers or leaves? Front or back side of leaf on the fabric? Mordant fabric or dip leaves in mordant? Which mordant? Use a “blanket” fabric or not?

In this sample I have used grape leaves, weld leaves and flowers, and redbud leaves (the round ones in the middle).

BP-2103-5.jpg

I used two scarves with the leaves sandwiched between. If there is a difference between using the front and back of the leaves, that should show up here as one would be the reverse of the other. I saw this for some leaves, but not others. Sometimes the leaves actually print and other times they act as a resist and show a silhouette. In this example I don’t much of a difference in the way the leaves printed.

BP-2104-5.jpg
BP-2104-6.jpg

I have found that pecan and grape leaves are some of the best leaves here for this technique. Those three in the middle are Chinese pistache and “leak” tannin, becoming much more blurry and dark. I did no prep to the silk fabric, but I dipped the leaves in an iron solution. I use two scarves to sandwich the plant material so I end up with two finished projects in mirror image.

BP-2105-1.jpg
BP-2105-2.jpg
BP-2106-2107-4.jpg

There are close-ups below of parts of this scarf. Leaves are grape, madder and pecan on he left and grape and asparagus on the right with a sprig of redwood and maybe another pecan.

BP-2106-2107-5.jpg
BP-2106-2107-6.jpg
BP-2106-2107-9.jpg

For this piece I rolled the bundle with a blue “blanket” that was supplied for use in the class and after simmering I unrolled the scarf at the bottom of the photo above. Notice that some leaves acted as a resist while others printed from the pigment in the leaves.

BP-2107-2.jpg

This is the final scarf after washing. It is for sale here.

BP-2110-1.jpg
BP-2110-3.jpg

Ths one has grape, maple, and locust leaves, and I am amused by the little bit of madder root in the right photo, just under 3 individual madder leaves. You have to look for it but you can see that the root did leave an impression in the final piece.

BP-2110-5.jpg

Its also interesting to try and decide if the face-up or face-down position of the leaves made much difference. It looks as though it did with the locust leaves in this one, but maybe not most of the others.

BP2110-2-2.jpg

Here is that last one after washing. You can see the root impression—that squiggle just above the folded part on the left side.

BP-2111-1.jpg

Here is one last set of photos. I used three flowers—flannelbush (yellow), hollyhock, and roses. I included locust, rose, and hollyhock leaves.

BP-2111-6.jpg

This is how the scarves looked after unrolling the bundle.

BP2111-2.jpg

This is the final piece after washing. This one is for sale here along with several others.

Trial and Error

There is a lot of trial and error when I am developing a new idea or product. This time it seems like a lot of error. I have done successful ecoprinting in the past. This is the technique of soaking fabrics in tannin and iron solutions, applying leaves or flowers, rolling into a tight bundle and then steaming. Images of the plants remain on the fabric. Here is a blog post of a previous ecoprint day that turned out successfully.

EP-10a-2.jpg

These are some examples of using this technique on silk scarves.

The last time I wove a long warp for blankets I wove some in plain weave with white (natural sheep color) yarn with the plan to ecoprint the resulting blankets. The challenge has been to find a way to steam the fabric without folds. I had an idea and I talked Dan into creating a custom steamer contraption.

IMG_2749.jpg

This is a canning kettle on a propane burner. At the top of it is the lid from an old enamel canning kettle. When placed upside down on this pot it fits perfectly and Dan cut out the center circle to make room for the “chimney” he created using corrugated metal roofing. (This is why we rarely throw things away—you never know when you will need them.)

IMG_2751.jpg

This is the wool fabric laid out so that I could measure the plastic I needed and the “blanket” fabric—cotton yardage. The next step was to wet both fabrics. The wool was soaked in an iron solution and the cotton fabric in a tannin solution. I’ll tell you more later about the steps I forgot that may have made a difference in the outcome.

IMG_2753.jpg

The wet wool was spread out on plastic. Notice the uneven coloring. That points to one of the mistakes. The wool should have been damp before I put it in the iron solution. As it was I put dry fabric in the solution and the wool resisted a thorough wetting. I’m also not sure about the color. The wet areas look rusty (after all, we’re talking about iron) and I don’t know if the iron should have been better dissolved or if I even used the right amount.

I arranged leaves. I looked at one of my sample pieces from last year to decide which leaves to use. These are eucalyptus, locust, sheoak, and redbud. My garden is pretty well gone right now so I didn’t have coreopsis flowers or weld, both of which I used successfully before to add some color.

IMG_2757.jpg

Next the cotton “blanket” soaked in tannin goes on top. As the tannin soaked fabric touches the iron soaked fabric, a reaction occurs that makes those dark gray spots. I thought I took photos of all the steps, but I forgot a photo of the fabric rolled onto a 45” piece of PVC pipe.

IMG_2758.jpg

When I print on scarves, they are rolled onto short lengths of pipe and they fit into a kettle on stop of a rack for steaming. In this case we filled the pot with water and started it heating.

WE made sure the water was boiling and then mounted the custom made tube to act as the steamer.

IMG_2760.jpg

We lowered the PVC tube wrapped with fabric into the steamer tube.

A dowel at the top kept it from sinking down into the boiling water.

IMG_2765.jpg

We put the lid on. Notice the handle on the tube. Dan riveted the tube together and then put handles (left over from something other project) on it for ease of lifting it (with hotpads).

The final arrangement.

IMG_2775.jpg

When the pot was boiling hard the whole contraption was kind of rocking—probably because of our uneven floor. We turned the heat down to keep the water simmering. I know there was plenty of steam because it was dripping off the lid at the top. I took a video and here it is on Youtube. Hopefully that link will work.

I let this cool in the contraption overnight. I had to work at the Artery the next day and it wasn’t until I got home that I had time to unroll the fabric.

The cotton fabric certainly changed color indicating that the reaction of the tannin and iron was complete. I think the splotches are where the wool fabric was still dry.

UhOh. Not the result I had hoped for. Refer to that other blog post to see the potential of this if it is done right.

This is the whole piece of fabric spread out on a terry cloth towel that I use for drying blankets. Not a success. Back to the drawing board. In reading through that post from last summer it occurred to me that maybe the biggest mistake was not putting the wool fabric in a mordant bath first.

So the steamer contraption worked. I now can steam a large piece of fabric without folding it. But there is something missing in my technique of mordanting, soaking, applying leaves, etc. I’ll keep working on this and report back.