More Eco-Printing and Oak Tree Trivia
/After the first try at eco-printing I wanted to do it again. I also wanted to investigate the technique a little more. As I read blog after blog by people who are eco-printing I got thinking that, as in much of the "fiber arts" there are few rules, some guidelines, and a lot of trial and error. You have to sift the known facts from all the other information that has probably just been passed from person to person. "We do it this way because...that's just how you do it." I always think of the story of the housewife (sorry, an old story) who cut the rear end off the turkey before she put it in the oven. Someone asked her why and that was the way her mother did it. It turns out that her mother did it because the only roasting pan wasn't big enough to hold the turkey. I digress... Eco-printing, 2nd try:
I had a plan. I wanted to try as many different trees and bushes from our property as I could and print them all on one piece of fabric and use it for a curtain in front of the open closet in my newly painted office. I bought four yards of cotton fabric and cut it in half. I scoured both pieces and then mordanted one in alum. More internet perusal. I read many instructions about mordanting cotton and it seems that the most recommended mordant is aluminum acetate. I had aluminum potassium sulfate so that's what I used. You're supposed to follow it up with calcium carbonate or wheat bran. I threw in some CaC03 just in case.
Some friends were here to experiment also. I found that I was running around gathering stuff, trying to figure out how to print on a 45" wide piece of fabric when the maximum pan size would allow 16", etc. and I didn't get any photos of the process.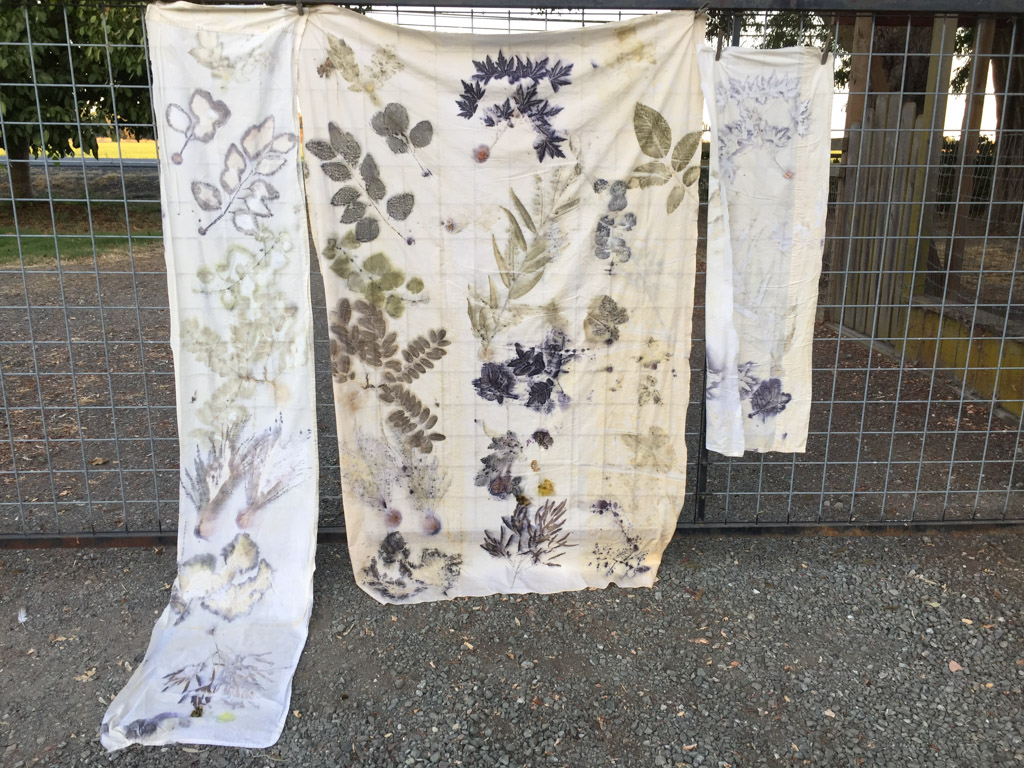 Before you print with plants you soak the mordanted (or not) fabric in iron or tannin (or not). Then you apply the plant material (possibly dipped in iron or not). You cover it with a "blanket" of cotton fabric and then roll the whole thing up with plastic on a dowel or in my case, 2" PVC pipe and tie it tightly. Then you steam for 90 minutes. Why 90 minutes? That's just because that is how long everyone else says to do it.
  I started with a map because I wanted my two fabrics to have the same plants in the same positions. I started with the top row of this map and covered it with the blanket material and plastic. Then I placed more blanket material (old cotton sheets), placed the plants on that (upside down from how I wanted them to appear) and folded over the middle third of the fabric. I placed more plastic to separate the middle and outer third layers and applied more plants. At this point I started to think of other plants I wanted to add so some of these were thrown on in between the others or tucked into the middle layer. The photo above the map is the second piece of fabric with part of it's blanket fabrics, which by this time were any scraps that I could make work. You can see in the blanket fabric on the left the mirror image that was created.
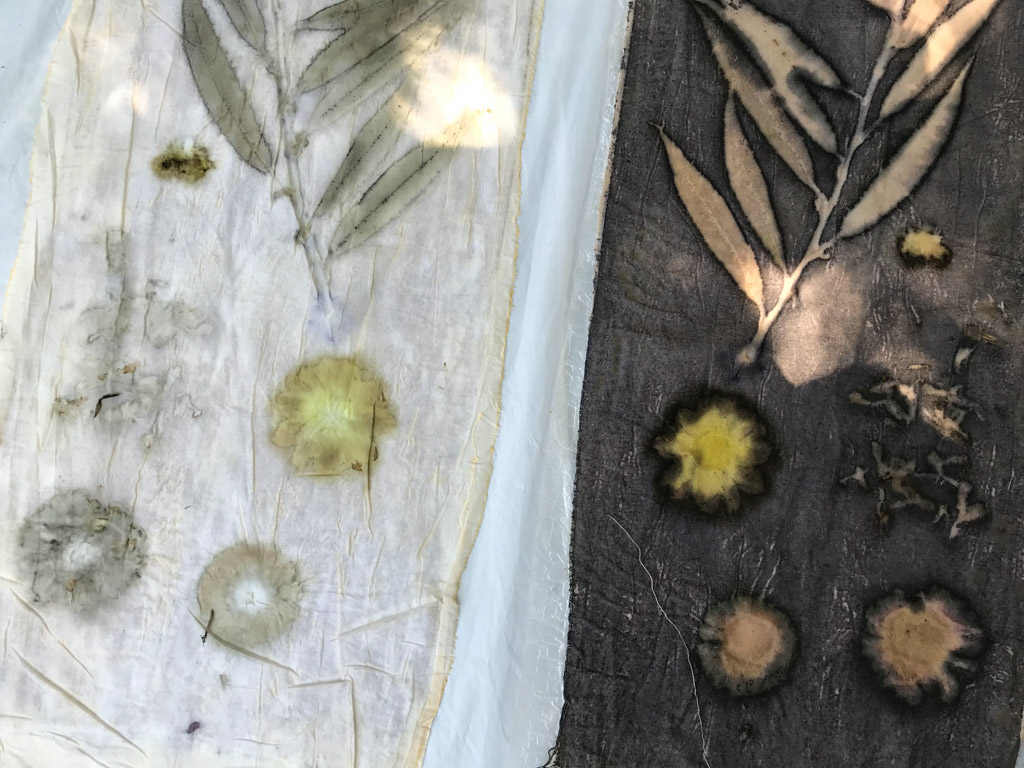
 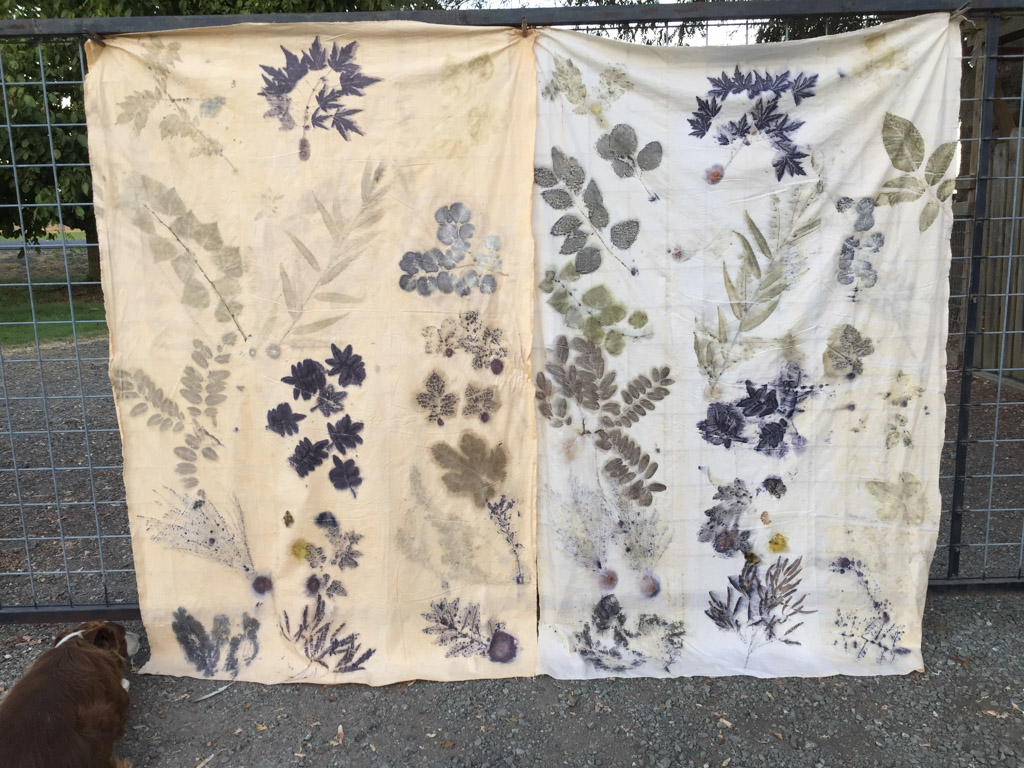 Here are the two fabrics I printed. Both were dipped in the iron solution before using them. The one on the left was the first one that I did. I think it looks a little less messy because I took more time with it. By the time I got to the second one everyone else was taking theirs out of the steamer and I wanted to hurry...and add more plants that I thought of. Differences: The one on the left was not mordanted and the one on the right was. I don't know that it made any difference at all in how the plant material reacted with the fabric. Both were dipped in iron. Reasons for the difference? The first project (on the left) took me a lot longer because I was running around finding things like matches and hot pads, cutting PVC pipe, etc. I could see the fabric darkening as it sat out. By the time I got to the second one the iron bath had been mixed longer and I hear that the effectiveness is quickly reduced after it has been mixed. So was it the time the iron bath had been mixed? The time between dipping and steaming? The alum mordant on the right?
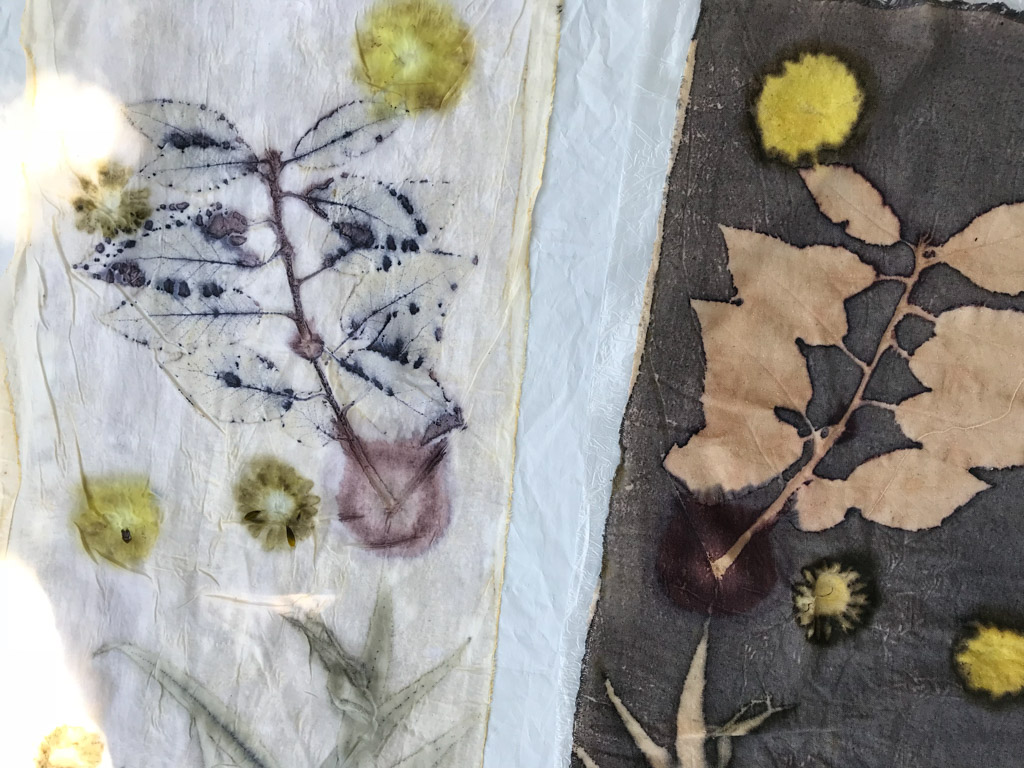
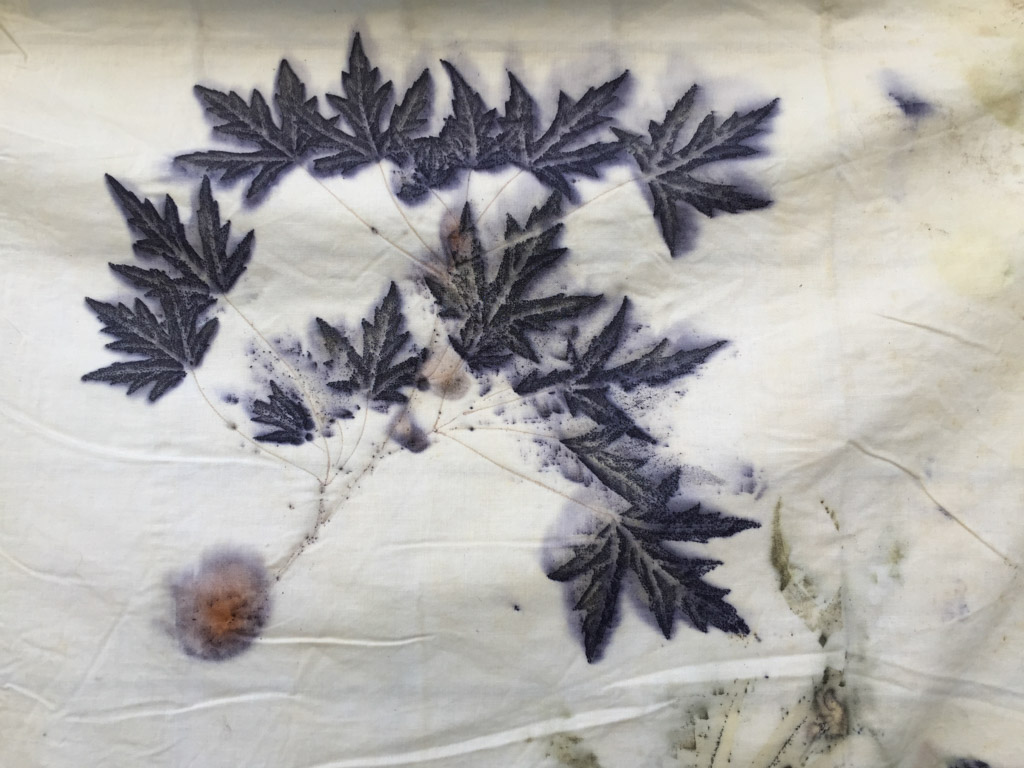 Maple leaves. When you see the spots that look like bulbs--those are the tannins leaking out of the stems in plant material with plenty of tannin. (At least that's he explanation I've heard.)
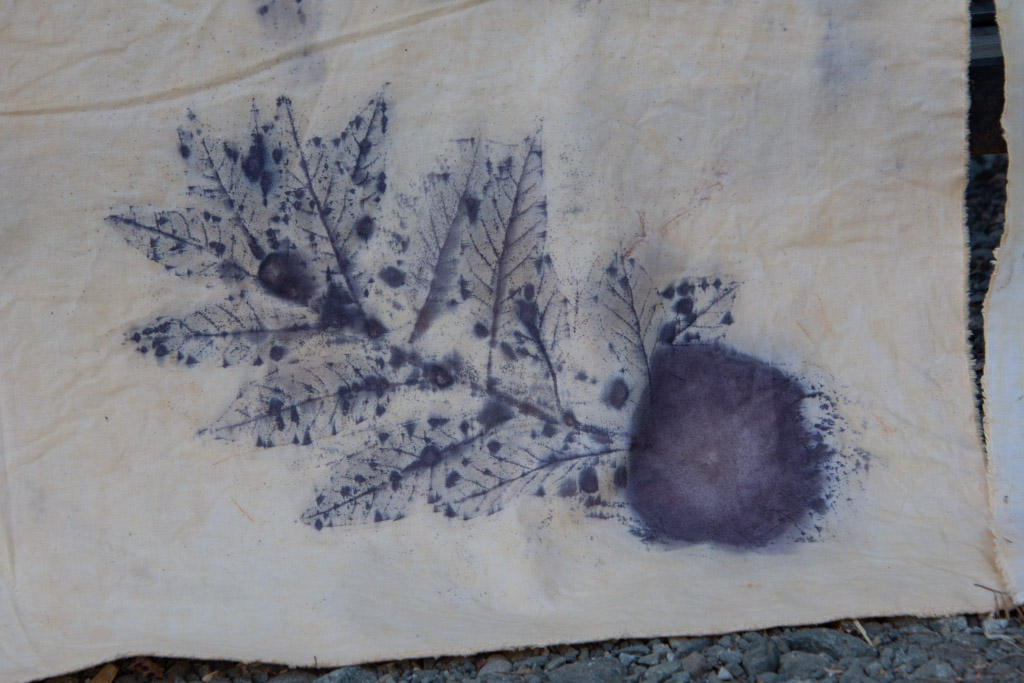 Oak branch.
I decided to do one more. One person had brought silk scarves for people to use.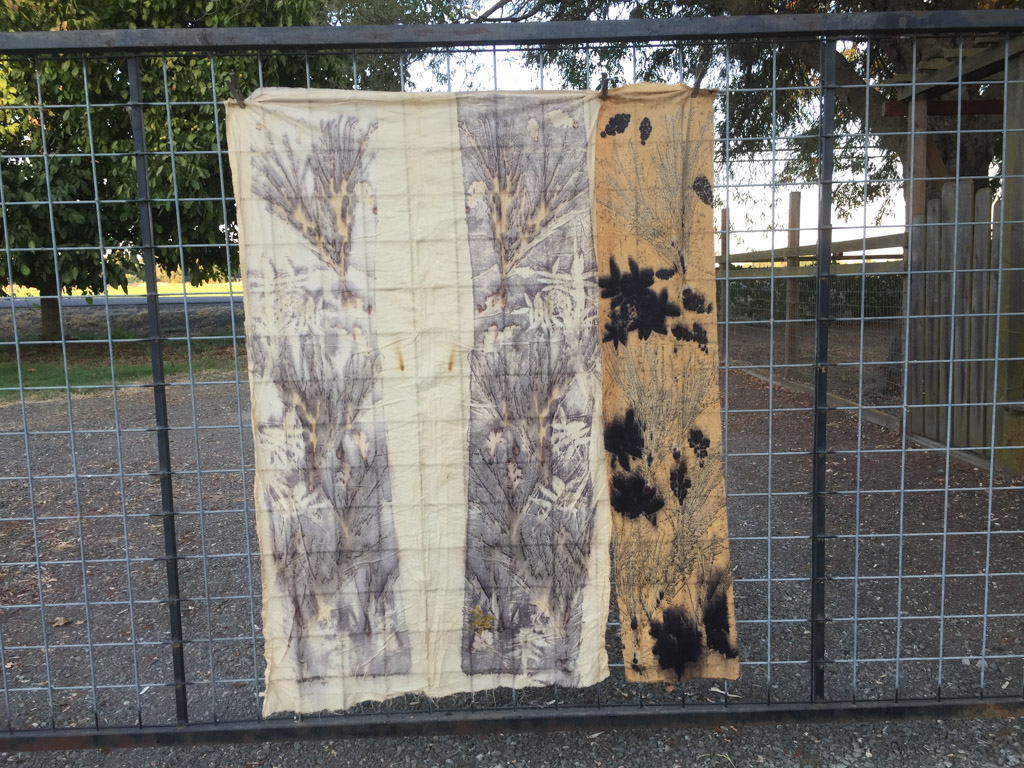 I dipped the silk (right) in tannin and the blanket material (large piece of cotton that I didn't cut and instead just folded over) in iron. I used three plants on the silk.
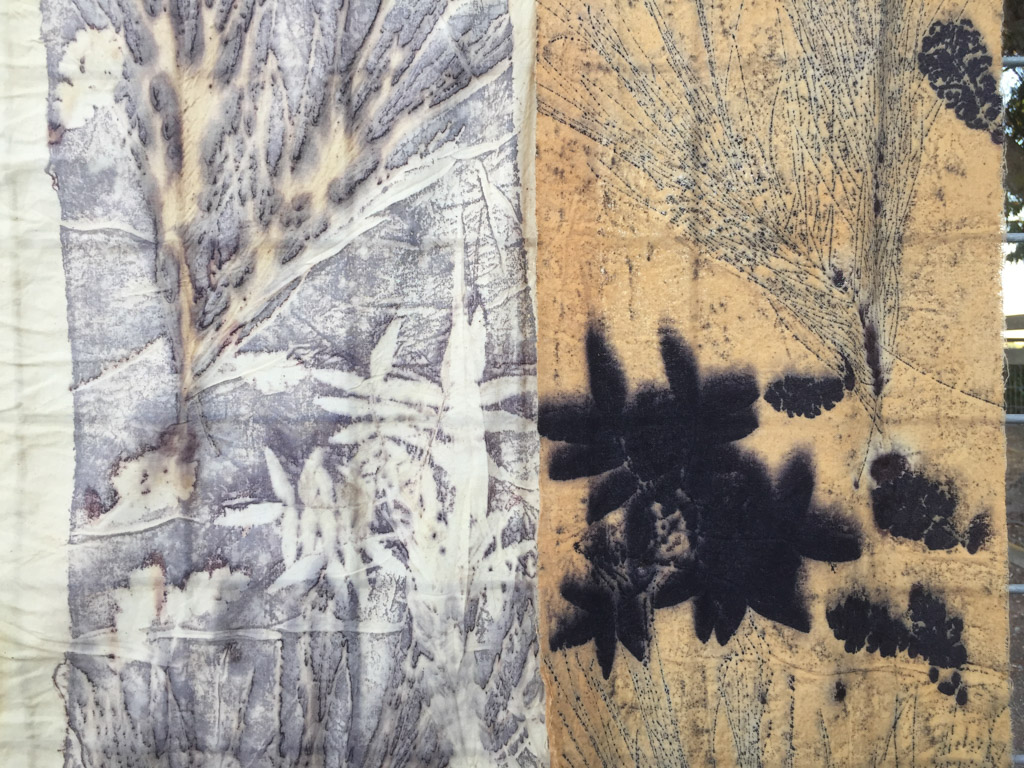 We were loving the effect of the sheoak (Casuarina sp) on some of the other pieces. That's that wispy one that you see better on the silk. I had added Chinese pistache and oak leaves. Wow. Way too much tannin effect. The outline of the pistache on the blanket fabric is pretty but it doesn't look so good on the silk. Note to self--use one leaf, not a branch, and maybe even that would be too much. I lost the definition in the oak leaves as well.
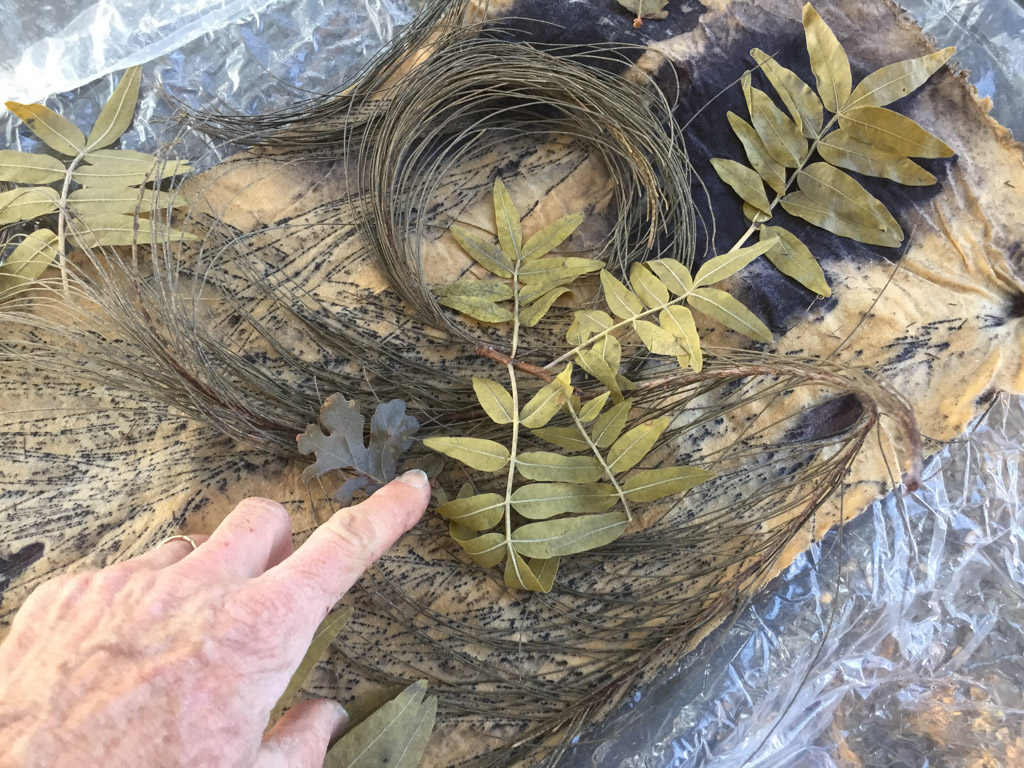 Here are those three plant materials after dyeing.
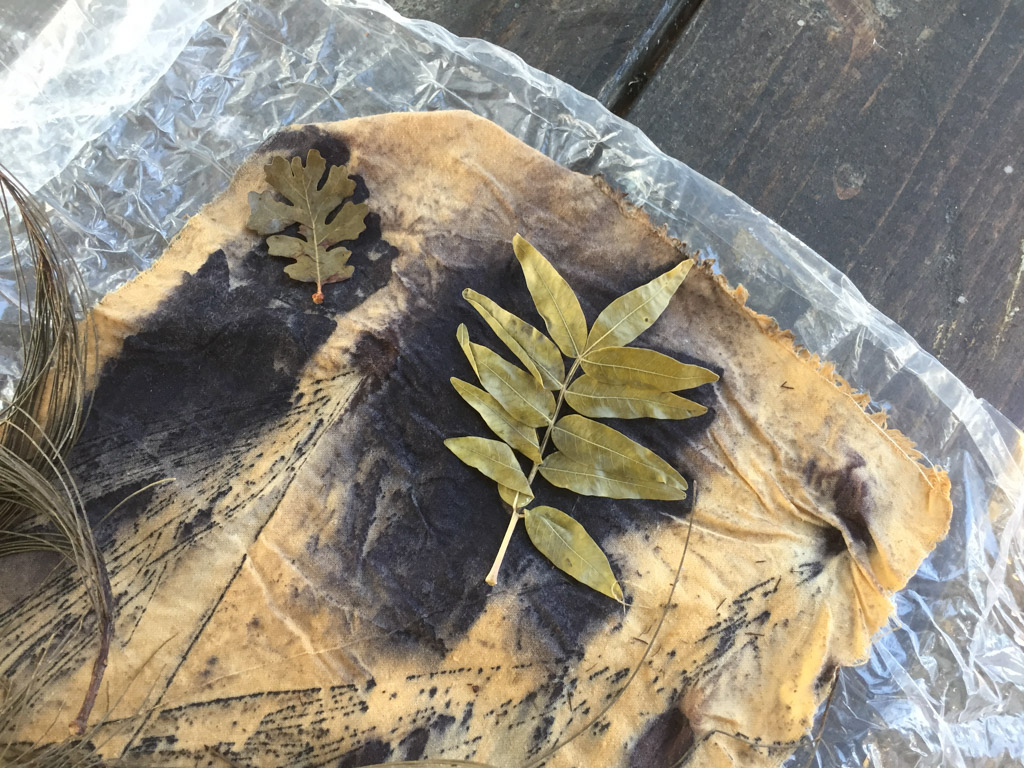 Another view of the oak leaf and the Chinese pistache.
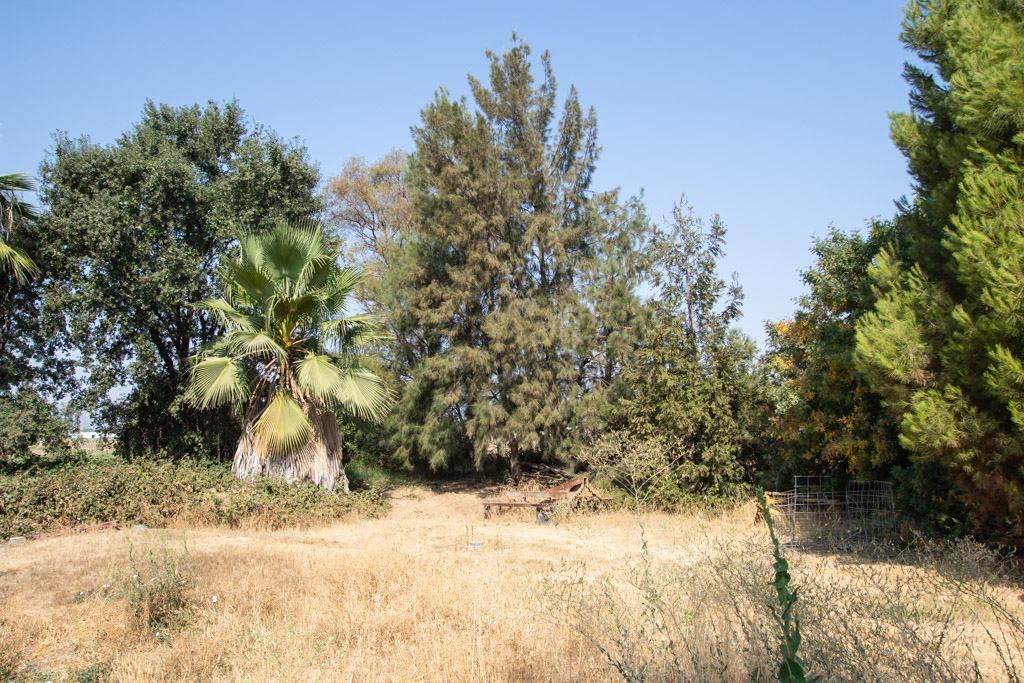 I went out back to photograph the trees. Oak on the left with a palm in front of it. The sheoak is the tall feathery looking one and the smaller tree turning yellow is the pistache.
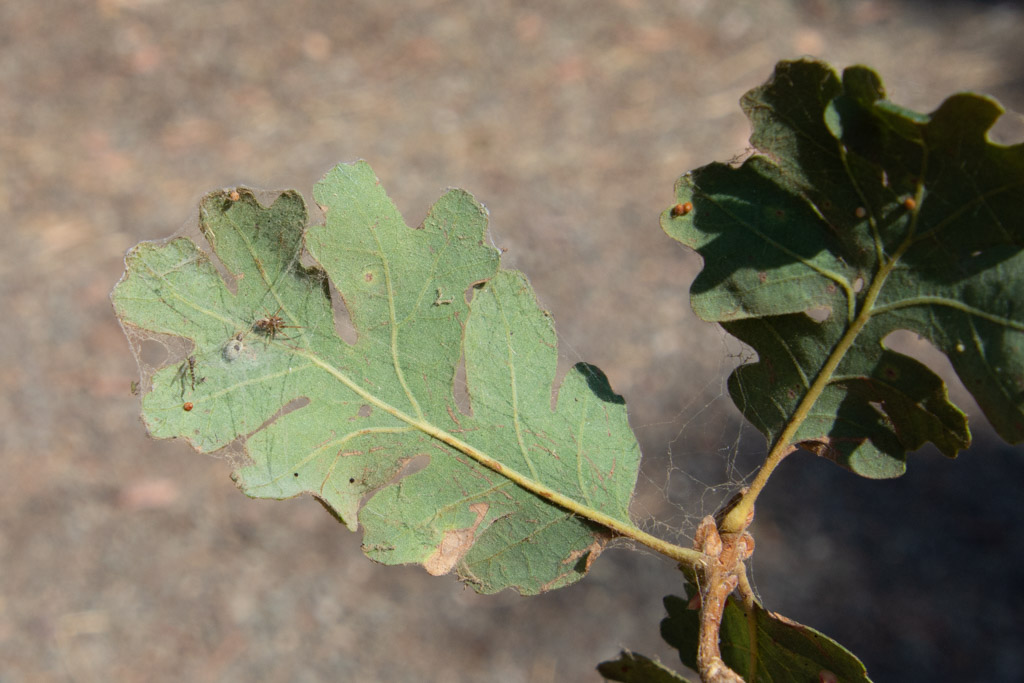 I brought some of the oak leaves in to check ID because I wasn't sure which oak this was (Valley Oak). Look at what a community of other things is on the underside of the leaf. There are two different spiders there as well as...
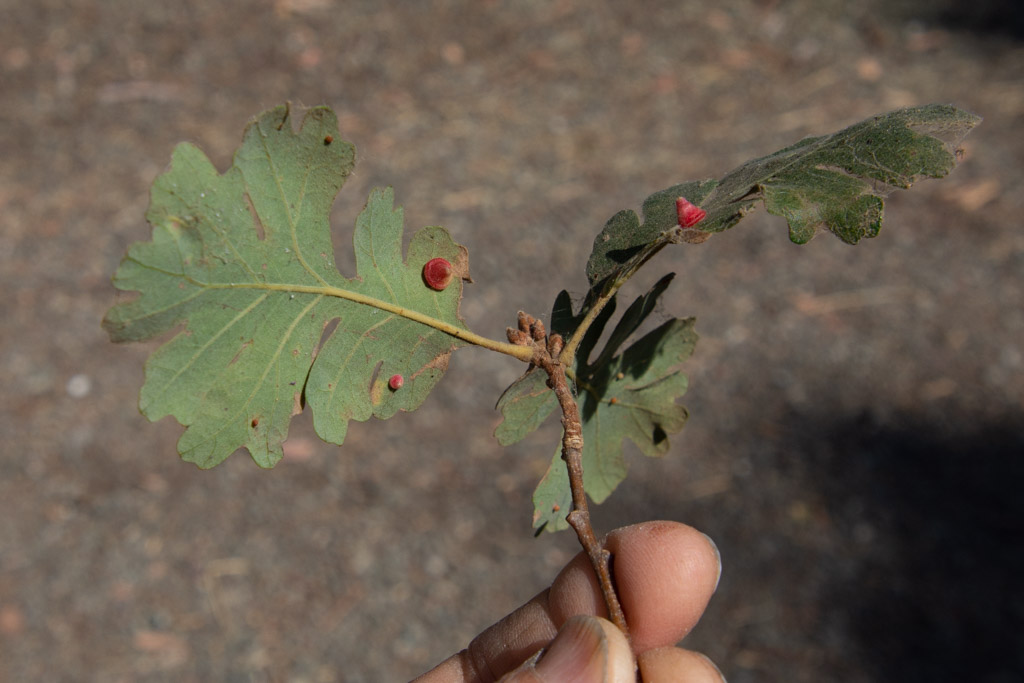 ...these growths that were described appropriately enough on-line as "miniature chocolate kisses covered with red foil". These are the response of the tree to the Red cone gall wasp, a tiny (fruit-fly size) wasp that "lays her eggs inside the leaves of the host tree. They hatch and start eating the leaf, which causes the plant to form a hard structure in order to wall off the irritant. This gall is just what the insect needs, though: more plant tissues to eat. The larva pupates and develops into an adult wasp before it emerges." This oak has plenty of the big round oak galls too. I think that I may have to take some photos and write another post about the dozens of things living in this tree.
 Here are some examples from the friend who showed us how to do this.
 We went out to the backyard to get started. There was a supervisor already on duty to make sure that we didn't mix up the buckets. One says Iron Sulphate and the other says Tannin.
 We dipped our fabric in one or the other depending on if it was silk or cotton and then laid it out on the table.
 I brought weeping willow fronds, oak and eucalyptus leaves, and zinnia and dahlia flowers. I started with silk dipped in tannin solution and then covered this with cotton soaked in the iron solution
 After rolling everything up and tying it snugly the fabric rolls were steamed for an hour and a half.
 While the first batch was steaming we all worked on another project. We were limited by the pot size to a 12" roll. To print a wider fabric it needed to be folded. So that's what I did with this one. This piece is 36" wide. I laid leaves on the center strip and folded one side over. The design would be symmetrical on those two panels. Then I spread plastic on that fabric and placed leaves on the plastic to be printed on the third layer to be folded over.
  Here are the first ones being unveiled.
 The plant material leaves an outline as it resists the iron on the cotton layer that was applied to it. The iron turns the silk varying shades depending on the strength and freshness of the iron solution.
 Interestingly the cotton "blanket" that was rolled up with the silk is sometimes just as appealing as the silk piece.
 This is a cotton pillowcase in which the design is not from a resist but from the plant material itself.
 Here is the project that I did first. I like the printed cotton as much as I do the silk. The willow is the most striking feature. The color spots at the bottom and top are from the flower heads.
 Here is the larger piece that I did.
 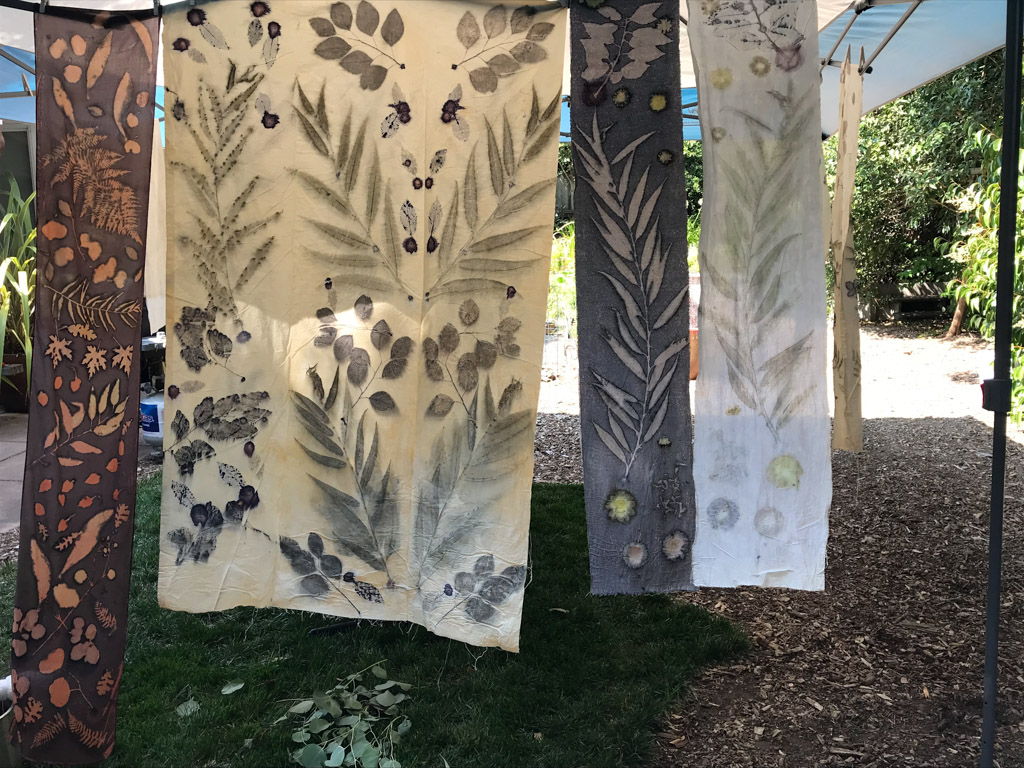 You can see the symmetry of the folded cloth on the right. The third layer has a different look. I think those splotchy parts has something to do with the plant material being rolled right onto the plastic. The tannin "leakage" from the oak leaves is also apparent on this piece.
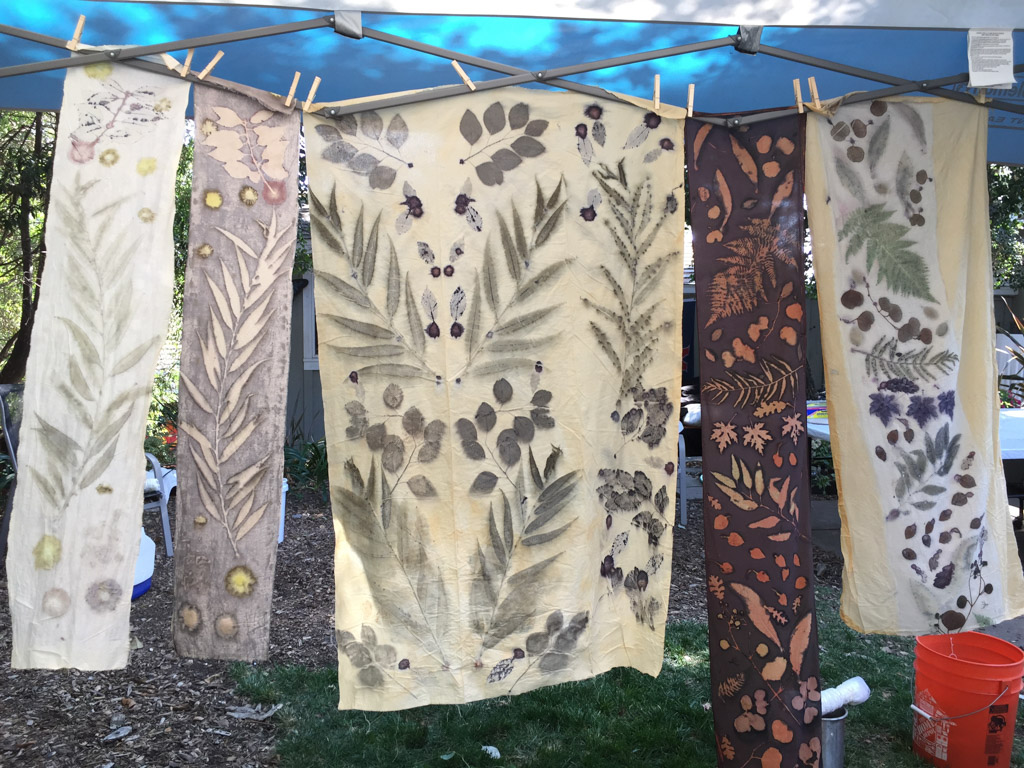 The pieces on the right were a silk scarf that started out a rusty red and the mirror image is the blanket cloth for that scarf. Both are beautiful.
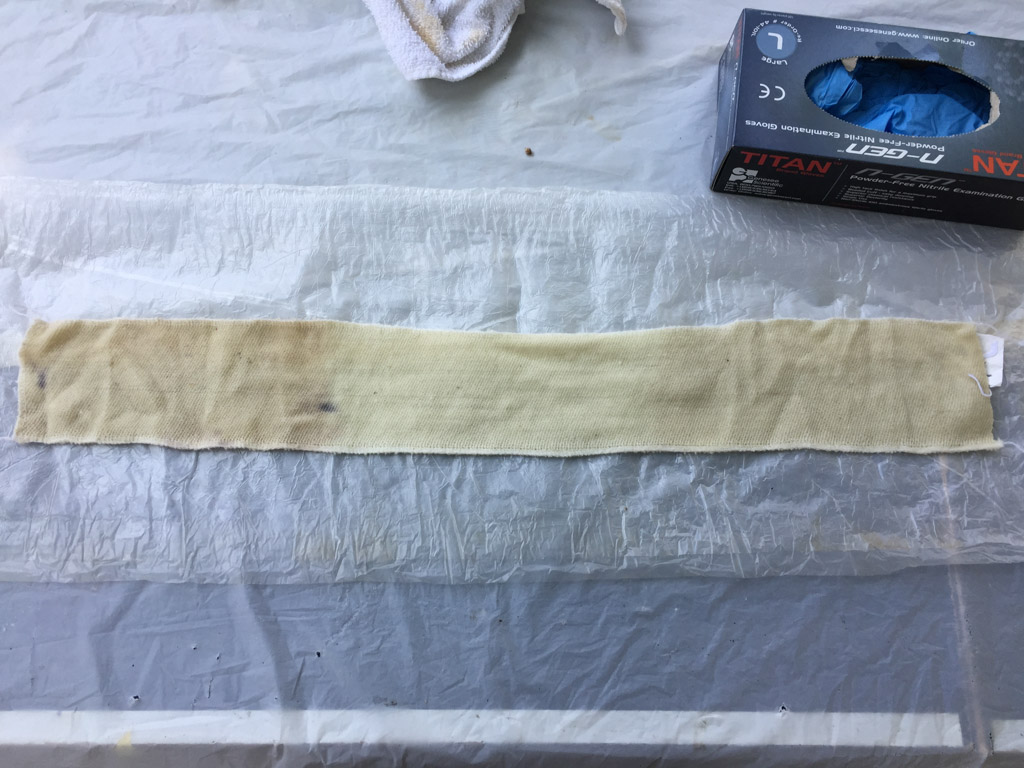 I went there planning to make some wool samples. However I had not mordanted my wool so I decided to save most of it. This piece was dipped in iron (left side) and tannin (right side) and the middle was not treated. I laid out black walnut leaves and did the steaming later at home.
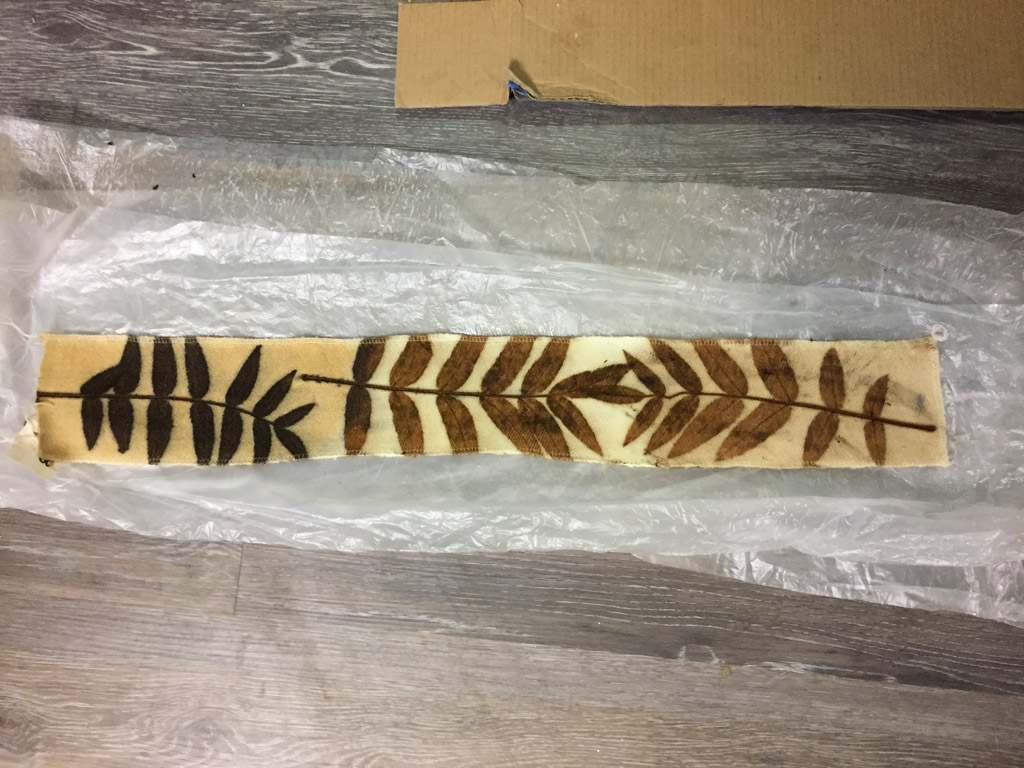 This is the finished sample. Next step will be to wash all of these and see how they hold up. I'm excited to do more of this for sure. ... Like I need another thing to distract me right now.